Beautiful Hairband for Wedding Headband Rustic
Specifically designed for a chic, elegant, and rustic wedding or event look, this headband will enhance your beauty!
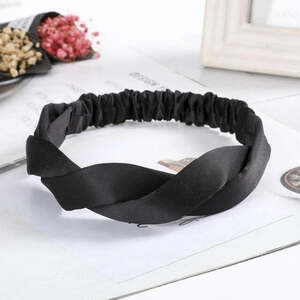
Elegant Fashion Accessory
Add a touch of style and trend with this beautiful hairband for weddings and special occasions
High-Quality Material
Made of polyester and high-quality fabric, this stretchable and elastic headband features a matte or satin color finish
Technical Specifications of the Hairband:
- Lightweight: 30 grams
- For Women
- Type of Pattern: Matte or Satin Color
- Style: Fashionable and Trendy
- Can be worn in all seasons, for birthdays, parties, weddings, work
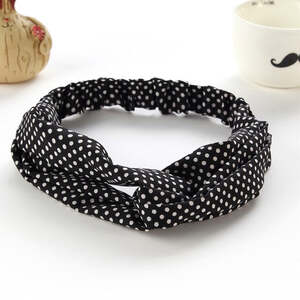
Enhance your look with this beautiful braided hairband for any occasion, from winter to summer. Its retro and trendy style goes well with a casual outfit or a light, flowing dress in the warm summer weather. Take advantage of free standard shipping on all orders this month! Create a natural braided headband with your hair by following these easy steps. Braided headbands are becoming one of the hottest summer hairstyle trends. Celebrities have all been seen sporting the Boho babe look. But to switch it up from the traditional done look, why not try a French braided headband? They are cute, effortless, and easy to create.
Braided Headband: Step 1
Step 1: Detangle Your HairBefore starting your braid, make sure your hair is completely smooth and tangle-free. Use a wide-tooth comb to get rid of any knots if your hair is wet or a detangling brush if your mane is dry. This will make braiding much easier and less painful. If your hair is wet, apply a shaping paste or gel on towel-dried hair to keep your braid in place and prevent pieces from falling out as you create the style.
Braided Headband: Step 2
Step 2: Begin French BraidingTake a section of hair under your ear and start French braiding towards the front, pulling pieces that are about an inch wide at a time. To make braiding on your head easier, flip all your hair to one side and tilt your head in that direction while working. I suggest gathering hair parts to create a more natural, free, and Boho chic look. If you want to try a regular braided headband, your hair needs to be long enough for the braid to go across the entire length of your head on its own. Take a hair just behind your ear (about 5 cm wide) and start braiding it as usual. Once the braid is done, loop it over your head and use two bobby pins to secure it behind your ear.
Braided Headband: Step 3
Step 3: Continue Braiding Your HeadContinue braiding from the front to the base of your head. If your hair is long enough, keep braiding until the braid reaches the original starting point under your ear, except on the opposite side of your head.
Braided Headband: Step 4
Step 4: Secure with a Clear ElasticWhen your braid is complete, tie a small clear elastic at its end and place it under the thicker part using bobby pins to hold it in place. For volume, tuck the smaller strand bits under the larger ones, lifting the front, thicker part of your braid. Finish your look with some medium-hold hairspray and you’re good to go!